
Last updated September 10, 2026
Full 25-point door and opener safety check with every visit - springs, cables, rollers, tracks, and your LiftMaster or Chamberlain opener included
You get a price before we start. It does not change when the truck arrives.
 Before
 After
After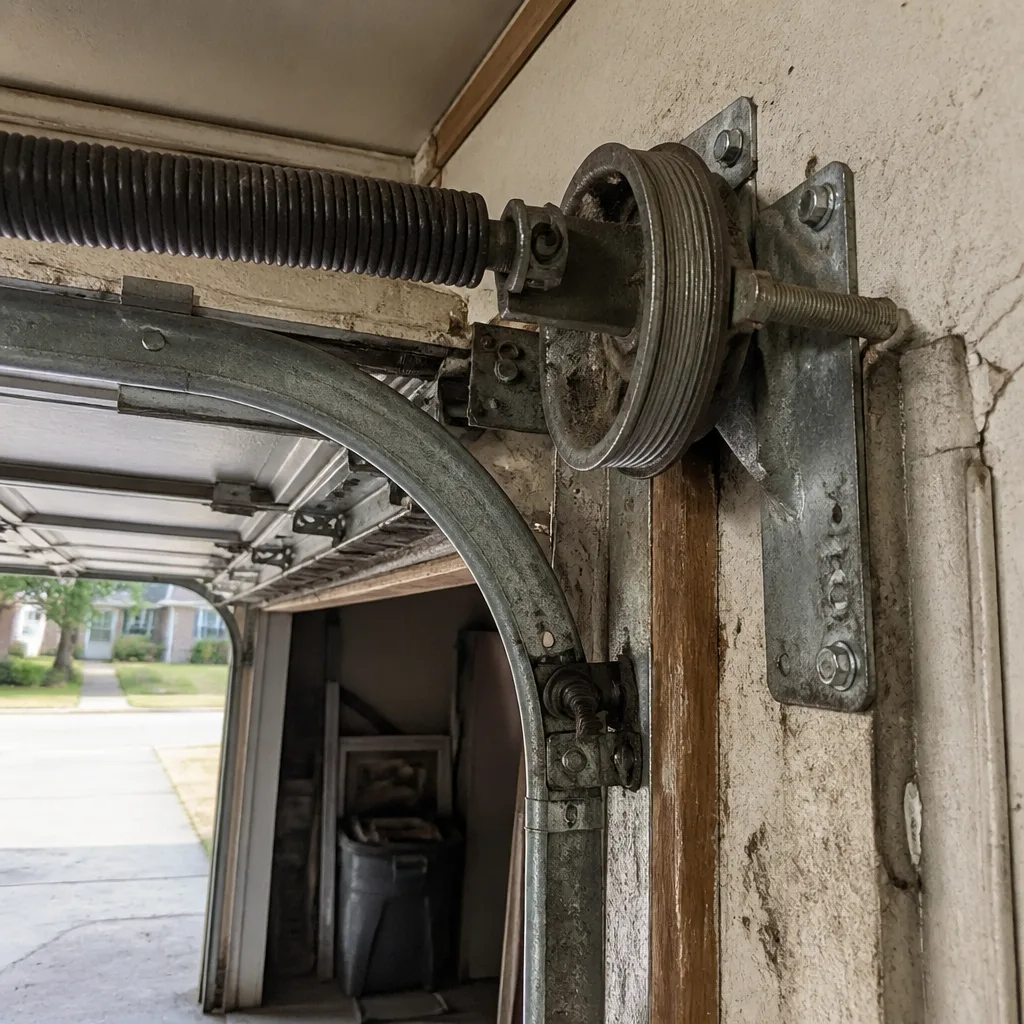 Before
 After
After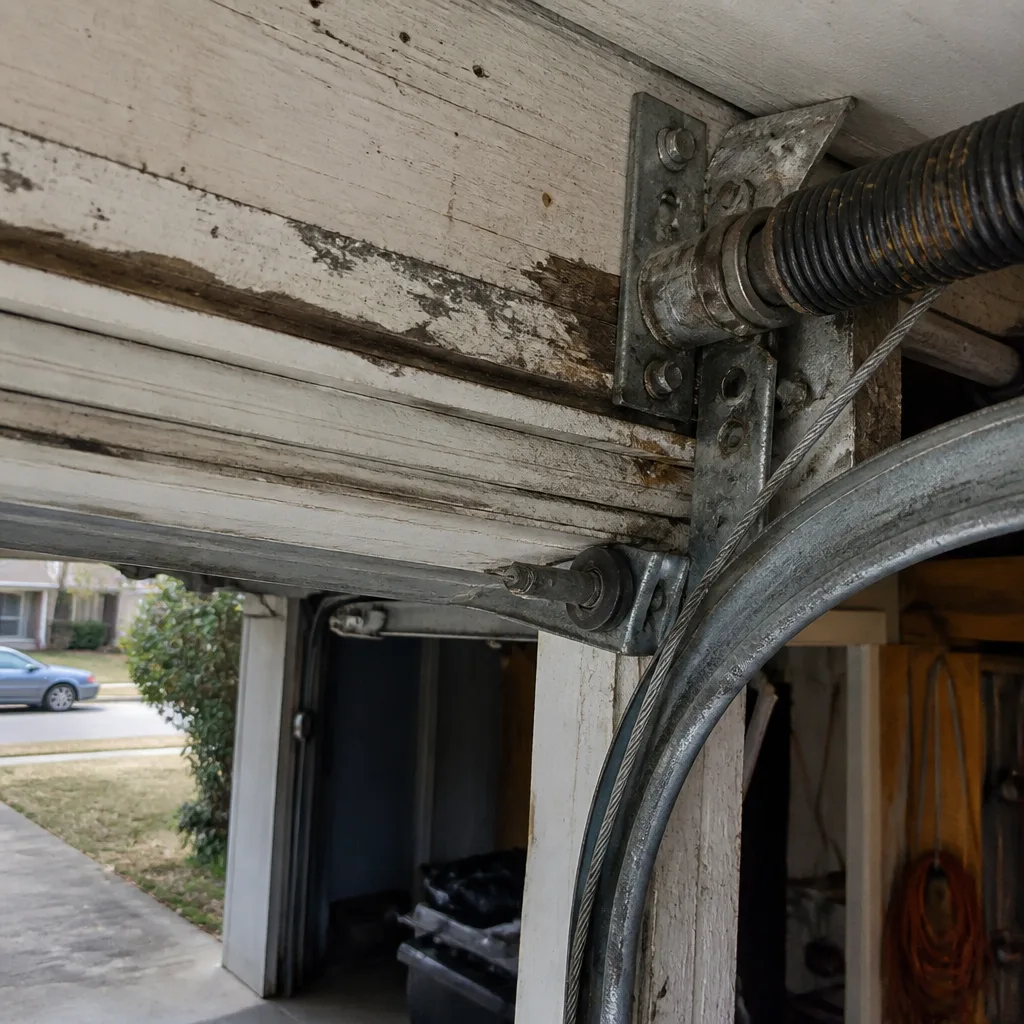 Before
 After
AfterGarage Door Repair Maintenance Checklist for Pasadena Homeowners
The number-one cause of premature torsion spring failure in Southeast Texas isn’t heavy use. It’s moisture collecting inside the spring coil every time a Gulf front rolls through, and no generic checklist tells you to look there. In Pasadena, we replace springs that snapped at 6,000 cycles when the same spring in a dry climate would have lasted twice that. This guide walks through what actually fails here first, season by season, so you can catch the cheap fixes before they become a door that won’t open on a Monday morning. For a broader look at common issues, see our Garage Door Warning Signs: A Pasadena Homeowner’s Reference Guide.
Quick Answer
A garage door maintenance checklist for Pasadena, TX needs to focus on moisture: inspect the bottom weather seal after every heavy rain, wipe down torsion springs and hardware with a dry cloth monthly during humid months, lubricate with a silicone-based spray twice a year, check spring tension visually each season, and schedule a pro inspection before hurricane season in May and after any freeze event. Most Pasadena garage doors need lubrication more often than doors in drier climates because Gulf humidity accelerates rust on exposed steel.
Table of Contents
- Why Pasadena Humidity Changes Your Maintenance Schedule
- The Monthly 10-Minute Checklist
- Season-by-Season Maintenance Calendar for Pasadena
- Weather Seal Inspection: Flood Damage and Rot
- The Right Lubricant for the Gulf Coast
- Spring Tension: What You Can Check vs. What Needs a Pro
- Rust Progression: How to Judge Your Timeline with Photos
- Common Mistakes to Avoid
- When to Call a Professional
- Frequently Asked Questions
- The Bottom Line
Why Pasadena Humidity Changes Your Maintenance Schedule
Pasadena sits in a subtropical climate zone where the average relative humidity runs above 70% for most of the year. That means the air itself is carrying water, and that water finds its way into every unpainted metal surface on your garage door. Homeowners who follow a generic maintenance checklist written for Dallas or Phoenix are missing the one variable that causes most of our service calls: condensation.
Here’s what we see on a typical Pasadena garage door that gets no maintenance. The torsion springs above the door develop a fine layer of surface rust within 18 months. That rust doesn’t just sit on the surface. It works into the microscopic stress points in the spring steel, and every cycle of the door (open and close) flexes those points. Rust plus flex equals a spring that snaps early. We’ve replaced springs in Pasadena that were only three or four years old, while the same spring in a dry climate routinely lasts seven to ten.
The fix isn’t complicated. A dry rag wiped across the springs once a month during humid season removes the condensation before it can work into the steel. That single habit, which takes less than two minutes, does more for spring life than anything else a homeowner can do without touching the spring itself.
Beyond the springs, humidity attacks the hinges, the rollers, the cables, and the bottom bracket where the lift cable attaches. In houses built before 2000, which is a lot of Pasadena’s housing stock, the garage often lacks proper ventilation, which makes the problem worse. An unventilated garage in Pasadena is a humidity trap, and your garage door hardware is sitting right in the middle of it.
If you’re starting fresh with a maintenance routine, or if you’ve just had a Garage Door Repair in Pasadena job done, the schedule below is built around what we actually see failing in this climate, not a generic template.
The Monthly 10-Minute Checklist
This is the routine we recommend to every homeowner in Pasadena. It takes about ten minutes once you’ve done it a couple of times, and it’s designed to catch the six things that fail first in a humid, flood-prone climate. Do this on the first Saturday of every month and you’ll catch almost every preventable failure before it becomes a service call.
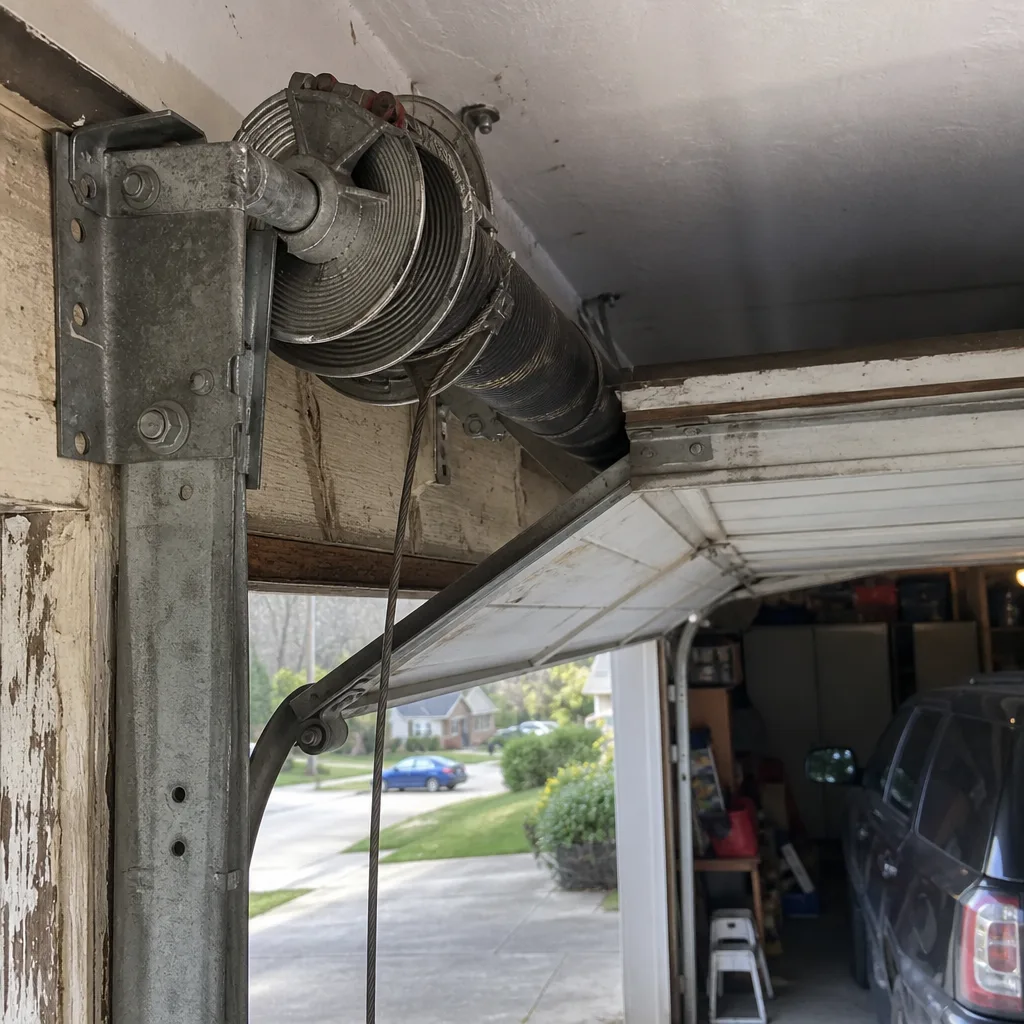
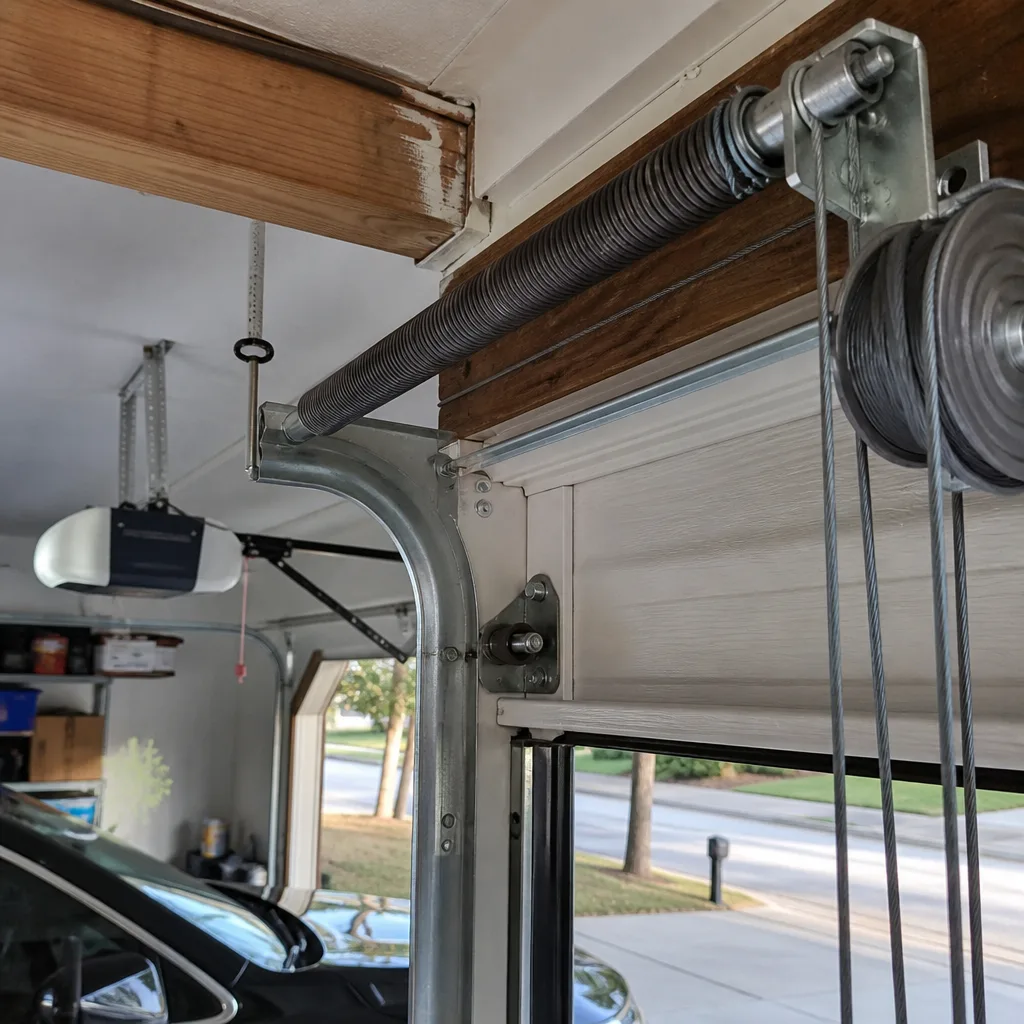
- Wipe down the springs. Use a clean, dry cotton rag. Run it across both torsion springs above the door. You’re removing condensation and checking for rust at the same time. If the rag comes back with reddish-brown streaks, note where the rust is and take a photo so you can track progression over time.
- Look at the cables. Stand inside the garage, door closed, and look at both lift cables that run from the bottom bracket up to the drum. You’re checking for fraying, which looks like loose strands sticking out of the cable, and for rust. Frayed cables are a time bomb. A cable that snaps under load releases the spring tension violently.
- Check the bottom seal. Crouch down and look at the rubber weather seal running along the bottom of the door. In Pasadena, this seal takes abuse from standing water, flood debris, and Gulf humidity. It should feel pliable, not dry or cracked. Run your hand along it. If it’s crumbling or you can see daylight under the door, it’s time to replace it.
- Test the balance. Pull the red emergency release handle, then lift the door manually by the handle. It should lift with roughly 10-15 pounds of effort and stay open at about waist height when you let go. If it’s heavy, the springs are losing tension. If it slams shut, the springs are dangerously weak. Reconnect the opener afterward by pressing the wall button or running the opener through a full cycle. Leave the heavy-lifting diagnosis to a pro, because a door that’s heavy means the springs are doing less work, and the fix involves winding and unwinding springs under extreme tension.
- Listen to the opener. Run the door through one full open and close cycle. A healthy garage door sounds like a steady hum with occasional clicks. A grinding noise usually means the rollers are worn. A straining sound means the opener is working harder because something is binding or the springs are weak. This is the first warning sign that a repair is coming.
- Wipe the tracks. Use a damp rag to wipe any visible buildup from the vertical and horizontal tracks. Don’t use lubricant on the tracks. Grease on tracks attracts dirt and creates a sticky paste that makes the door work harder. The tracks need to stay dry and clean.
If any of these six checks turns up something that worries you, call us. Don’t wait for the symptom to get louder, because it almost always does, and the fix costs more by then. You can reach Otto’s Garage Door at (346) 623-5419, and a live person answers, even at odd hours.
Season-by-Season Maintenance Calendar for Pasadena
Pasadena doesn’t have winter in the way most of the country thinks of it, but we do have a weather calendar that drives garage door maintenance. Here’s how to work it through the year.
May: Pre-Hurricane Season Check
Atlantic hurricane season starts June 1, and the Gulf Coast gets its share of wind-driven rain and pressure changes. May is the month to do a full safety check on the garage door, because the garage door is the largest opening in your house and the most common point of structural failure in a wind event. A garage door that fails inward during a hurricane pressurizes the house and can lift the roof.
- Inspect the rollers for cracked nylon or worn bearings.
- Check the hinges for looseness; a hinge with play allows the door panels to flex under wind pressure.
- Test the door balance (step 4 in the monthly checklist).
- Replace any dry, cracked bottom seal so wind-driven rain can’t get under the door.
- If you have a manual lock on the track, test it and make sure you still have the key.
We run a lot of pre-hurricane inspections in May, and we’re happy to do the same for you. A written estimate is free, and a second opinion on anyone else’s estimate is free too.
February: Post-Freeze Check
Pasadena doesn’t freeze often, but when it does, like February 2021, the effects on garage doors linger for months. Cold snaps cause metal to contract, which pulls on every connection point. Homeowners often hear popping or creaking during a freeze and then forget about it until the door starts acting up in March.
- Re-check every bolt and fastener you can reach with a socket wrench. Cold contraction can loosen them permanently.
- Look at the spring cones and cable drums for any sign that the freeze caused the spring to seat differently.
- Check the opener’s force settings. If the door got stiff during the cold and the opener’s auto-reverse kicked in repeatedly, the settings may need adjustment.
- Inspect the weather seal for cracks that formed when the rubber got brittle in the cold.
September: End-of-Summer Checklist
By September, the door has been through four months of peak humidity, afternoon thunderstorms, and the hottest temperatures of the year. Heat expands the metal panels and can cause warping in older doors, especially wood or fiberglass ones that have absorbed moisture. Walk the door and press on each panel. Listen for soft spots. Check the paint for blistering, which indicates moisture intrusion under the surface. If you see it, sand and repaint the affected area before the next round of humidity sets in.
December: Dry Season Tune-Up
Winter is the closest thing Pasadena gets to a dry season, so it’s the best time for deeper maintenance like lubrication (which needs a dry surface to adhere properly). It’s also the time to address any rust that appeared over the summer, when rain and humidity kept metal surfaces continually damp. A wire brush, a rust converter, and a coat of cold galvanizing spray on the torsion springs can add years to their life. But if you’re not comfortable working around a spring under tension, leave it to us-we offer our Garage Door Repair services with trained technicians. We’d rather do it safely than have a homeowner hurt.
For new installations and full door replacements, the dry season is also a good time to schedule the work, because the install crew isn’t fighting rain delays. If you’re thinking about a Garage Door Installation in Pasadena, December through February tends to be our least booked window.
Weather Seal Inspection: Flood Damage and Rot
In Pasadena, the bottom weather seal on a garage door does more than keep out leaves and bugs. It’s the first line of defense against standing water, and after any significant rain event, especially anything that leaves water in the driveway for more than an hour, that seal should get a quick look.
What Flood Water Does to a Garage Door Seal
Flood water in Pasadena is rarely clean. It carries silt, road oil, and whatever the storm picked up along the way. When that water sits against the rubber seal at the bottom of your door, it leaves a film behind. Over time, that film breaks down the rubber compound, causing it to dry, crack, and lose its shape. A seal that’s lost its shape doesn’t sit flat against the concrete, and once it’s out of shape, water drives underneath it.
Here’s how to inspect the seal without pulling it apart unnecessarily:
- Close the door completely.
- Stand inside the garage and look along the entire bottom edge where the seal meets the floor. You should see no daylight. Any visible gap is a place for water and pests.
- Run your hand along the seal from one side to the other. You’re feeling for stiffness, cracks, or sections that feel gummy. Healthy EPDM rubber or PVC feels smooth and slightly pliable.
- Look at the ends of the seal. This is where rot starts first in Pasadena, because the ends sit closest to the door opening and get the most sun and rain exposure.
- Check the aluminum retainer channel that holds the seal. If it’s bent or the screws are rusted out, the seal won’t sit straight even if the rubber is new.
Replacing a bottom seal is one of the few garage door maintenance tasks that’s genuinely DIY-friendly, as long as the door itself is in good shape. It’s a piece of rubber that slides into or snaps onto a channel. The trick in Pasadena is buying the right material: pick EPDM rubber over PVC. PVC seals get brittle faster in hot sun and are more likely to crack after a winter cold snap. EPDM handles the Gulf Coast temperature swings and UV exposure better.
The Right Lubricant for the Gulf Coast
Here’s a Pasadena-specific fact that most generic maintenance guides get wrong: white lithium grease is the wrong lubricant for garage doors in a high-humidity coastal climate. White lithium is a grease, and grease is a magnet for dust, pollen, and salt-laden air particles. On the Gulf Coast, those particles mix with the grease and form an abrasive paste that accelerates wear on hinges and rollers. That’s exactly backwards.
What you want is a silicone-based spray lubricant or a PTFE (Teflon) based dry film lubricant. These go on wet, penetrate into the hinge pin or roller bearing, and then the carrier evaporates, leaving a dry lubricating film behind. That film doesn’t attract dust and doesn’t wash off easily in high humidity.
Brands we reach for in the field: 3M Silicone Lubricant, WD-40 Specialist Silicone, and Blaster Advanced Dry Lube with PTFE. You’ll find all three at the hardware stores around Pasadena. Don’t use regular WD-40 (the original formula) for lubricating garage door parts. WD-40 is a solvent and rust penetrant, and while it’s useful for freeing up a stuck part, it evaporates quickly and leaves metal mostly dry. It’s the wrong tool for ongoing lubrication.
Here’s where to lubricate, and where to leave things alone:
- Hinge pins: A short spray at each hinge joint, twice a year at minimum. In humid months, we recommend every three months.
- Roller bearings: Steel rollers have ball bearings inside. A spray at the bearing while rolling the door helps work the lubricant in. Nylon rollers with sealed bearings don’t need lubrication; if they’re squeaking, the bearing is failing, not dry.
- Bearing plates: The end bearing plates at each end of the torsion tube, where the spring system sits, need lubrication to prevent the tube from binding.
- Lock hardware: If your door has a manual slide lock or keyed lock, a shot of dry lube keeps it from seizing in Pasadena’s humidity.
- Tracks: Nothing. Leave them dry. Oil or grease on the track collects dirt and creates a grinding paste.
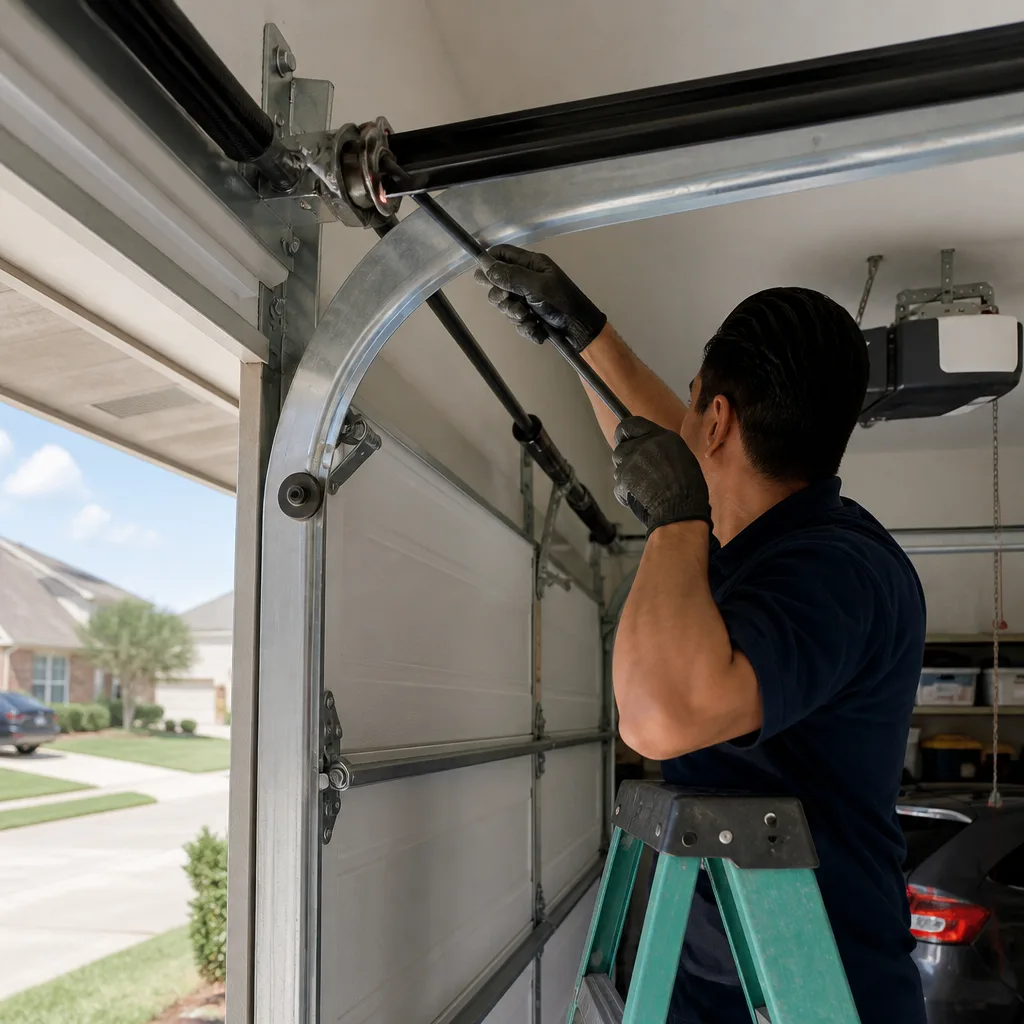
- Torsion springs: A light coat of lubricant on the springs themselves helps prevent rust, but it must be applied carefully. Never reach through the spring coil to spray the back side. Spray from a safe distance, and never put your hand or a rag inside the coil when the door is under tension. This is a visual-and-wipe maintenance area only, not a deep-clean.
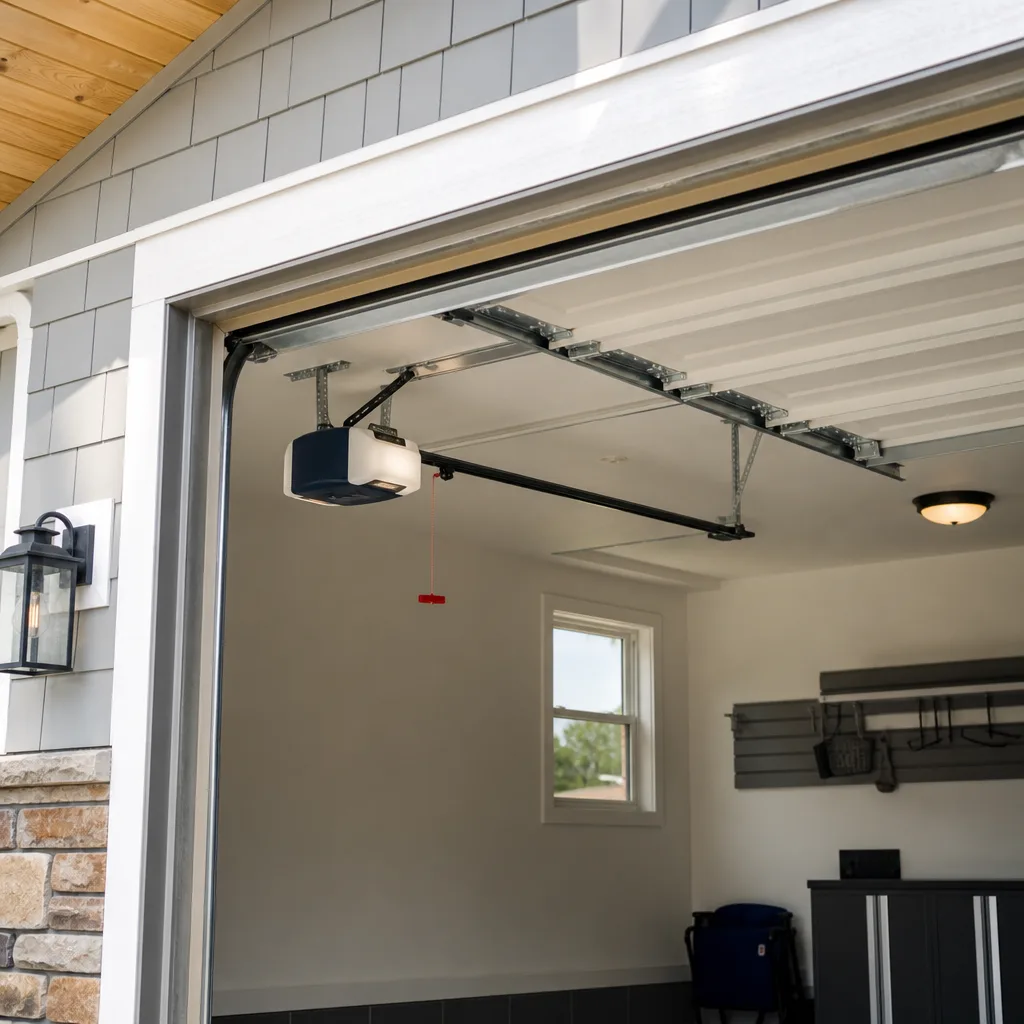
If you have an opener, you don’t need to lubricate the rail in most cases. Most modern openers from LiftMaster and Chamberlain use a belt or chain drive that doesn’t require homeowner lubrication, and the rail for a screw-drive opener is pre-greased at the factory. Applying the wrong lubricant to an opener rail can cause the carriage to slip or bind. When in doubt, leave the opener alone.
Spring Tension: What You Can Check vs. What Needs a Pro
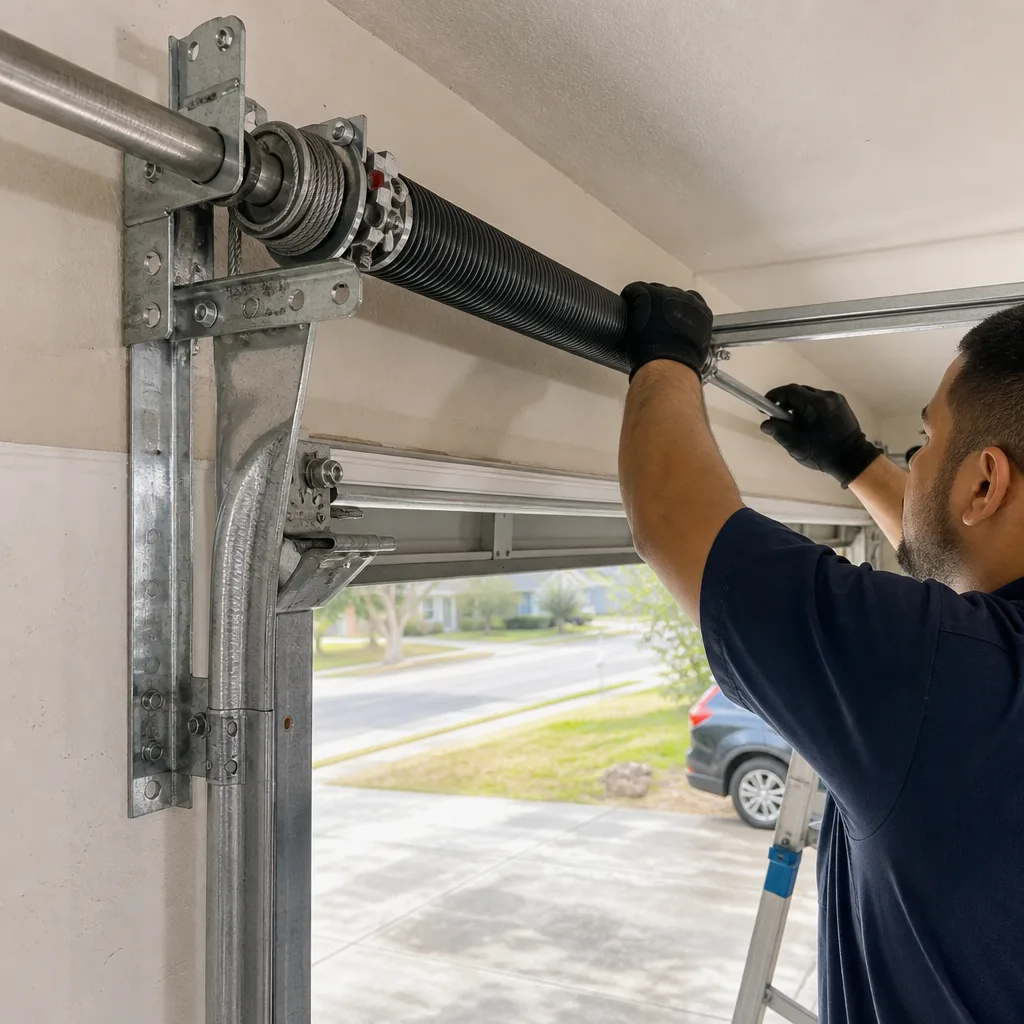
Let me be direct about this: garage door springs are the most dangerous part of your house, pound for pound. A torsion spring is wound tight enough to hold 100 to 200 pounds of door weight, and when it snaps, it releases that energy instantly. People have lost fingers, broken jaws, and worse trying to adjust springs without the right tools. I say this as someone who does this work every week in Pasadena: respect the spring.
That said, homeowners can and should perform several visual checks that don’t require touching the spring under tension. Here’s what’s safe:
- Visual rust check: Stand on a step ladder (never on a chair or bucket) and look at the springs. Note the color. Shiny steel is good. Dull gray with small spots is early rust. Flaking or reddish-brown patches are advanced. Take a photo each time so you can track changes.
- Gap check: Look at where the spring attaches to the stationary center bearing plate and the winding cone at each end. The spring should sit flat and tight against all components. A visible gap means the spring has shifted or the set screws have loosened, which is a professional repair.
- Balance test: The test I described in the monthly checklist (lifting the door manually) is a safe way to gauge spring health without touching the spring itself.
- Count the cycles: Torsion springs are rated in cycles, typically 10,000, 15,000, or 20,000 cycles depending on the build quality. A spring that’s been on the door for six or seven years and gets opened four times a day has roughly 8,000 to 10,000 cycles on it. It’s approaching the end of its designed life. No visual check will tell you exactly where you are, but age plus frequency of use gives you a rough estimate. If you’re nearing the end, a proactive replacement costs less than an emergency call, and it means the door won’t fail when you’re trying to get to work.
Here’s what you should never do yourself:
- Never loosen or tighten the set screws on a torsion spring.
- Never remove or adjust the winding cone.
- Never try to use two screwdrivers as substitute winding bars. Winding bars are hardened steel rods that fit exactly into the winding cone holes. Using anything else is asking for a serious injury.
- Never try to replace a broken spring on a door where one spring is still intact. The remaining spring is still under full tension, and removing or adjusting the door might seem easy but the stored energy is still live.
- Never cut or remove a lift cable without first releasing spring tension, which requires professional-level knowledge and tools.
A door is 200 pounds riding on two springs. Respect it. If your balance test comes up heavy, or you see rust marks on the spring, or you hear a loud bang from the garage in the middle of the night, call a pro. If it’s us, Otto answers the phone or the person who answers knows how to help. Same number: (346) 623-5419.
Rust Progression: How to Judge Your Timeline with Photos
Most Pasadena homeowners don’t notice rust on their garage door hardware until it’s advanced, because they’re not looking at close range every week. By the time you notice it from across the garage, it’s already well into the danger zone. Photos solve the problem. Here’s the progression we see on torsion hardware and what each stage means for your timeline.
Stage 1: Dusting (Months 6-12 in Pasadena)
The spring and hardware develop a faint, tan-colored film. It wipes off easily with a dry rag. This stage is cosmetic but it’s the canary in the coal mine. If you see dusting, start the monthly dry-rag habit and apply a light coat of silicone spray to the spring. You have years of life left if you act now.
Stage 2: Pitting (12-24 months)
Small dots, darker than the surrounding steel, appear on the spring coils and hinge plates. You can feel them with a fingernail. At this stage, the rust has penetrated the surface. It’s no longer wipe-off. The spring’s fatigue life is reduced every cycle. A wire brush and cold galvanizing spray can slow the progression, but the damage has started. Keep an eye on it, and start planning for replacement in a couple of years.
Stage 3: Scaling (24-48 months)
The surface flakes. Reddish-brown scales form, and you can see layered corrosion. At this stage, the spring is unreliable. The rust has created stress concentrators all along the steel, and a snap is a question of when, not if. We recommend replacement at Stage 3, because the cost of waiting is a door that fails without warning, usually at the worst possible moment, like when you’re late for work or coming home after dark.
Stage 4: Structural Failure
The spring breaks, or a cable snaps, or the hinge cracks. At this stage, the repair is no longer optional, and the door is likely off-balance or jammed. Don’t try to open or close it manually. Call a pro. We carry replacement springs for Genie, Clopay, LiftMaster, and every other major brand on the truck, so the fix is usually same-visit.
To use this progression at home: take a photo of your springs and hinges on the first Saturday of each month, from the same angle, standing in the same spot. Scroll back through the photos every few months. The change is much easier to see in photos than in person, because you’re seeing the trend, not just the current state.
If you’re not sure what stage you’re at, call us and describe what you see. We’ll give you an honest answer over the phone, and if it’s nothing to worry about, we’ll say so. We’d rather tell you it’s fine than sell you a spring you don’t need. That’s not how we do business in Pasadena.
Common Mistakes to Avoid
- Using WD-40 as a lubricant. The original WD-40 formula is a solvent and rust penetrant, not a long-term lubricant. It evaporates and leaves parts dry, and in Pasadena’s humidity, dry means rust. Use a silicone or PTFE dry film spray instead.
- Greasing the tracks. Grease on the vertical and horizontal tracks attracts dust and pollen, which turns into an abrasive paste. The tracks are designed to run dry. Wipe them clean and leave them alone.
- Ignoring the balance test. Most homeowners only think about their springs when the door is already broken. The balance test (lift the door manually) is the single best early warning system you have. A door that’s getting heavier is a spring that’s losing tension, and that’s the cheapest moment to fix it.
- Letting flood water sit against the seal. After a heavy Pasadena rain or any standing water event, the bottom seal needs a rinse and a wipe. Silt and road residue left on the rubber accelerate rot. A two-minute rinse after the water recedes adds years to the seal.
- Painting over rust without treating it. Slapping paint over rusted hardware traps moisture underneath and makes the rust spread faster. You need to remove the rust (wire brush), treat the surface (rust converter), and then prime and paint. Or leave the hardware unpainted and focus on lubrication, which is the more effective approach on the Gulf Coast.
- Adjusting the opener’s force settings to overcome a heavy door. When the springs weaken, the door gets heavy, and the opener has to work harder. Turning up the force settings masks the problem and strains the opener motor, the gear, and the door panels. The opener isn’t the problem. The springs are. Fix the springs, and the opener will do its job again.
- Waiting until the door won’t open to investigate a noise. Squeaks, grinding, and popping noises are diagnostics in disguise. A loud noise that goes away is still a warning. We see a lot of Pasadena homeowners call us after a noise they heard for months finally turned into a snapped cable. If it’s making noise, call someone.
When to Call a Professional
Call a pro when the balance test shows a heavy or slamming door, when you see fraying on the cables, when the spring shows Stage 2 rust or worse, when the door makes a loud bang, or when anything about the spring system looks wrong to you. These are not DIY troubleshooting scenarios. The downside of a mistake is a serious injury, and the upside of waiting is a more expensive repair. If you’re evaluating contractors, read How to Hire a Garage Door Contractor in Pasadena: A Step-by-Step Guide first. Otto’s Garage Door offers free estimates in Pasadena, and if you already have a written estimate from someone else, we’ll give you a second opinion on it for free too. Call (346) 623-5419 and a real person will answer, even at 9pm when the spring lets go.
If your opener is clicking but the door won’t move, or the door reverses immediately after hitting the floor, or it opens a few inches and stops, those can be sensor issues, force-setting problems, or a door that’s off balance. Some opener repairs are straightforward, but diagnosing the difference between an opener problem and a spring problem requires some experience. We train across LiftMaster, Chamberlain, and Genie openers, and we can usually tell you over the phone whether it’s something simple you can fix from the wall button or something that needs a truck roll. For more on openers specifically, see our Garage Door Opener in Pasadena page.
Frequently Asked Questions
Twice a year is the minimum in Pasadena, but during the humid months from April through October, we recommend lubricating hinges, rollers, and bearing plates every three months. The humidity accelerates rust, and a dry film lubricant is your main defense. If you hear squeaking, you’ve waited too long. Call (346) 623-5419 if you want us to do it while we’re out for another job, or if you want to see how we do it so you can copy the technique safely.
A DIY maintenance routine costs about $15-25 for a can of silicone lubricant and a few rags, and about 10-15 minutes a month of your time. If you’d rather have a pro do it, most Pasadena garage door companies charge $75-150 for a tune-up visit, which includes lubrication, tightening, balance testing, and a safety inspection. Otto’s Garage Door doesn’t charge for an estimate, and if we’re already at your home for a repair, we’ll walk the door with you and point out what we see at no extra charge. Upfront pricing means the quote we give you before we start is the price you pay when we’re done.
The most common reason is garage ventilation. Pasadena homes vary widely in how well the garage is vented. A garage with no ridge vent, no side vents, and a solid door traps hot, humid air, which condenses on any metal surface at night when temperatures drop. A garage with even one small vent lets that moist air escape. The second factor is proximity to the Houston Ship Channel and Galveston Bay. Salt in the air, even at low levels, accelerates corrosion. If you live closer to the water, expect faster rust and adjust your maintenance schedule accordingly.
You can safely do the inspection and lubrication tasks in this guide: the monthly checklist, the weather seal inspection, and the rust progression tracking are all DIY-friendly. What you should not do yourself is anything involving spring tension: no adjusting set screws, no winding or unwinding, no removing cables. Those tasks take specific tools and training, and the injury risk is real. The balance test is safe to perform and gives you the information a pro needs to make a diagnosis over the phone.
Look for three signs: visible daylight under the door when closed, a seal that feels stiff or cracked when you run your hand along it, or a seal that’s deformed so it doesn’t sit flat against the concrete. If the seal was sitting in flood water for more than a few hours, clean it with a mild soap and water, let it dry, and then inspect for brittleness. In our experience, a seal that’s been through one Pasadena flood event usually needs replacement within a year, because the petroleum residue in flood water breaks down the rubber compound. Replacement seals are inexpensive and the job is straightforward, but if you’re not comfortable doing it, call us and we’ll handle it during a regular visit.
For Pasadena’s humidity, we prefer belt-drive openers over chain-drive models. Chains are exposed metal, which means more surface area for condensation and rust. Belts are reinforced rubber or polyurethane, which shrug off humidity and run quieter. LiftMaster and Chamberlain both make excellent belt-drive models that hold up well on the Gulf Coast, and they’re what we install most often for Pasadena homeowners. A belt-drive opener also tends to handle a slightly heavier door better, which matters as your springs age. For a full discussion of opener options, see our Garage Door Opener in Pasadena page.
The Bottom Line
A garage door in Pasadena doesn’t fail because the parts are bad. It fails because the climate is relentless, and no one told the homeowner where to look. The springs rust from condensation. The seal rots from flood water. The hinges bind from grease that attracted half of Galveston Bay. The door gets heavy because the springs gave up, and the opener takes the blame. None of this is mysterious. It’s a predictable pattern, and a 10-minute monthly check plus a season-by-season calendar catches most of it before it becomes an emergency. If you’re not sure where your door stands, call Otto’s Garage Door at (346) 623-5419 for a free estimate. We’ve been in Pasadena since 2004, and we’ll treat your door like it’s on our own house. For more guides & resources, visit our blog.
Written by Otto Reinhardt, Owner at Otto’s Garage Door, serving Pasadena since 2004. Otto’s Garage Door is locally owned and owner-operated, with a published address and license number you can verify before the truck ever leaves our lot. For more on how we work, see the Otto’s Garage Door home page.